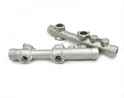

In the realm of brass investment casting, the creation of the ceramic shell is a pivotal process that significantly impacts the final quality of the cast parts. As a seasoned brass investment casting supplier, I'm excited to share with you the intricate steps involved in making the ceramic shell for brass investment casting.
1. Pattern Assembly
The journey of creating the ceramic shell begins with the pattern assembly. First, we produce wax patterns of the desired brass parts. These wax patterns are typically made using injection molding techniques, where molten wax is injected into precision - machined molds. The wax patterns are exact replicas of the final brass components, capturing all the detailed features and dimensions.
Once the individual wax patterns are created, they are attached to a central wax sprue. This sprue acts as a channel for the molten brass to flow into the mold cavity during the casting process. The wax patterns are carefully arranged and attached to the sprue using wax welding or other appropriate methods to form a wax tree. The design of the wax tree is crucial as it affects the flow of molten metal and the overall quality of the castings.
2. Primary Coating
After the wax tree is assembled, it undergoes the primary coating process. The primary coating is a thin layer of ceramic material that is applied directly to the surface of the wax patterns. This coating is made up of fine ceramic powder, usually zircon or silica, suspended in a liquid binder.
The wax tree is dipped into the primary coating slurry, ensuring that the entire surface of the wax patterns is evenly coated. The fine ceramic particles in the slurry adhere to the wax surface, creating a smooth and detailed layer. This layer is essential as it will directly contact the molten brass during casting and will determine the surface finish and dimensional accuracy of the final cast parts.
Once the wax tree is coated, it is allowed to dry. The drying process is carefully controlled to ensure that the coating dries evenly and forms a strong bond with the wax surface. This may involve using controlled - temperature and humidity chambers to optimize the drying conditions.
3. Stuccoing
Following the primary coating, the wax tree goes through the stuccoing process. Stuccoing involves applying a layer of coarser ceramic particles, known as stucco, onto the wet primary coating. The stucco particles are usually larger in size compared to the ceramic powder in the primary coating.
There are several methods of stuccoing, including fluidized bed stuccoing and rain stuccoing. In fluidized bed stuccoing, the wax tree is placed in a chamber where the stucco particles are suspended in a stream of air. The wet primary coating attracts the stucco particles, which adhere to the surface. In rain stuccoing, the stucco particles are allowed to fall like rain onto the wet primary coating.
The stucco layer serves multiple purposes. It provides additional strength and thickness to the ceramic shell, helps to improve the overall integrity of the shell, and also allows for better ventilation during the casting process. After stuccoing, the wax tree is again allowed to dry.
4. Build - up Coats
After the primary coating and stuccoing, a series of build - up coats are applied to the wax tree. These build - up coats are similar to the primary coating, but they are typically made with coarser ceramic powders and may have a different composition of the binder.
The wax tree is repeatedly dipped into the build - up coating slurry and then stuccoed with coarser ceramic particles. Each layer of the build - up coat adds to the thickness and strength of the ceramic shell. The number of build - up coats depends on the size and complexity of the wax patterns and the requirements of the final cast parts.
During the application of build - up coats, it is important to ensure that each layer is properly bonded to the previous layer. This may involve allowing sufficient drying time between each coat and using appropriate techniques to ensure uniform coating.
5. Drying and Curing
As each layer of the ceramic shell is applied, it is crucial to allow for proper drying and curing. Drying removes the moisture from the ceramic slurry, while curing involves a chemical reaction in the binder that hardens the ceramic shell.
The drying and curing process can take several hours or even days, depending on the thickness of the ceramic shell and the type of binder used. Controlled - environment chambers are often used to optimize the drying and curing conditions. Factors such as temperature, humidity, and air circulation are carefully monitored to ensure that the ceramic shell dries and cures evenly and forms a strong and durable structure.
6. Dewaxing
Once the ceramic shell has been fully built up and cured, the next step is dewaxing. Dewaxing is the process of removing the wax from inside the ceramic shell. There are several methods of dewaxing, including autoclave dewaxing, steam dewaxing, and flash firing.
In autoclave dewaxing, the ceramic shell is placed in an autoclave, which is a high - pressure chamber. Steam is introduced into the autoclave, and the high temperature and pressure cause the wax to melt and flow out of the shell through small vents. Steam dewaxing is similar, but it uses only steam to melt and remove the wax. Flash firing involves quickly heating the ceramic shell to a high temperature, causing the wax to burn off.
The choice of dewaxing method depends on various factors, such as the size and complexity of the wax patterns, the type of wax used, and the properties of the ceramic shell. After dewaxing, the ceramic shell is inspected to ensure that all the wax has been removed.
7. Firing
After dewaxing, the ceramic shell undergoes a firing process. Firing is a high - temperature heat treatment that further strengthens the ceramic shell and removes any remaining organic materials.
The ceramic shell is placed in a furnace and heated to a specific temperature, usually in the range of 800 - 1200 degrees Celsius. The firing temperature and duration are carefully controlled based on the type of ceramic materials used in the shell. During firing, the ceramic particles sinter together, forming a dense and strong structure.
Firing also helps to remove any residual moisture and organic binder from the ceramic shell. This is important as any remaining organic materials could react with the molten brass during casting and cause defects in the final cast parts.
8. Final Inspection
Once the firing process is complete, the ceramic shell is inspected for any defects. Visual inspection is carried out to check for cracks, holes, or any other visible flaws in the shell. Non - destructive testing methods, such as ultrasonic testing or X - ray inspection, may also be used to detect internal defects.
If any defects are found, the ceramic shell may be repaired or, in some cases, discarded. Only high - quality ceramic shells that meet the strict quality standards are used for brass investment casting.
Importance of the Ceramic Shell in Brass Investment Casting
The ceramic shell plays a crucial role in brass investment casting. A well - made ceramic shell ensures that the molten brass can flow smoothly into the mold cavity, fills all the details of the wax pattern, and solidifies to form a high - quality cast part.
The surface finish of the cast part is directly influenced by the quality of the primary coating of the ceramic shell. A smooth and detailed primary coating will result in a cast part with a fine surface finish. The strength and integrity of the ceramic shell are also important to withstand the high pressure and temperature of the molten brass during casting.


Related Investment Casting Products
If you are interested in other types of investment casting products, we also offer Stainless Steel Lost Wax Casting, Alloy Steel Investment Casting Products, and Aluminum Investment Casting.
Contact for Purchase and Negotiation
If you are in the market for high - quality brass investment cast parts or have any questions about the ceramic shell making process or our other investment casting products, we invite you to contact us for purchase and negotiation. Our team of experts is ready to assist you with your specific requirements and provide you with the best solutions.
References
- Campbell, J. (2008). Castings. Butterworth - Heinemann.
- Flemings, M. C. (1974). Solidification Processing. McGraw - Hill.
- Schaeffer, R. J., & Webster, G. M. (2001). Metal Casting: Principles and Practice. CRC Press.